Just bought an electric smoker or thinking of buying one but you don’t know how to use it? That’s OK, we’ve all been there. Fortunately, it’s very easy to get to grips with an electric smoker and once you do – you’ll be eating the tastiest food, ever. So here’s how it’s done.
How to use an electric smoker (in 17 steps)? Well, you need to season it, turn it on, get the wood chips, preheat it, put the water in, dry rub the meat, place the meat inside, lock the smoker, smoke the meat, maintain the smoke, rest the meat, unplug the smoker, cool it, remove the accessories, wipe it out, scrub it down, clean it and then dry it.
Each step is, of course, a bit more involved than that but don’t worry – we’ve broken everything down into easy to follow guidelines to ensure you can use your electric smoker in a flash.
How To Set Up Your Electric Smoker
Setting up an electric smoker is very easy – though it can be a little time consuming, you don’t have to watch it through the process though and your input will only take a few minutes at the very most.
Seasoning Your Electric Smoker
The first thing you must do with an electric smoker is to season it. This is for two reasons:
- It adds a protective layer of smoke to the inside which helps the smoker perform better
- It removes any dust, residue from manufacturing and any odors from manufacturing or transport
It’s an easy process to season a smoker too:
- Rub the inside with cooking oil (any oil is fine), make sure to rub the racks too
- Then fire up the smoke for 3 hours at 250 degrees Fahrenheit with nothing in it
- Turn it off, allow it to cool completely
Some models may not need to be seasoned – you can check the handbook to make sure. You should find that it only needs to be seasoned once unless you over clean it.
Turn On Your Smoker
OK, now you’re ready to get cooking and it’s time to plug the smoker in.
Then you can switch the power on, don’t worry, the smoker won’t start to preheat until you set the temperature, etc. it’s in standby mode.
You want to make sure that the cable is safely tucked away so that it won’t get accidentally removed during the smoking process because if it does – the food will probably be ruined by the time you notice and that can be very expensive, indeed.
Get Your Wood Chips In The Chip Tray
We have a tip about chip trays at the end that you should check out if you’re frustrated by the size of your chip tray.
You’ll find this on the right-hand side of the machine somewhere near the bottom of most electric smokers.
You just need to pull it out and fill it with chips (you can choose any kind of chips suitable for an electric smoker but don’t add pellets or sawdust or wood designed for other types of smokers). Hardwoods are the only suitable chips for smoking, don’t buy softwoods.
Then slide it back into the machine and flip the handle to ensure the chips are then dumped inside by the heating element.
Note: You want about 4 cups of chips for every 3-5 hours that you run your smoker. Make sure to keep an eye on the number of chips and top up as necessary – if you run out of chips, your food won’t taste very good.
Make Sure You Preheat Your Smoker
One thing that we find a lot of people neglect is preheating the smoker. This is a bad idea because it makes timing the cooking of your meat really difficult.
Given that it’s very easy to preheat an electric smoker, you don’t need to skip this step at all. Use the control panel to select the right temperature (for most meat smoking you will use 200 degrees Fahrenheit to 225 degrees Fahrenheit depending on the meat).
Then let it pre-heat for about 45 minutes, this will ensure an even temperature throughout the smoker and ensure that your meat has the best chance of cooking thoroughly without any deviations from the norm.
To check the smoking temperature for any given piece meat, it’s best to refer to the manufacturer’s instruction booklet – we’ve found that there are some unusual calibrations of temperature scale out there and the instructions tend to accurately reflect this.
Get The Water Into The Smoker
The final job is to get a container of water into the smoker. So, once the smoker has finished preheating get the little metal cup that comes with the electric smoker and fill it to the top with water.
Then gently slide it into the allotted space on the floor of the smoker. If there is no slot, you can just place the cup on the floor of the smoking chamber.
This is to create steam as the smoker heats up. This will ensure that your smoked meat remains moist and tender rather than turning into something resembling a leather boot – so, don’t forget the water.
You should use hot water when adding water to an electric smoker as this will ensure that it doesn’t reduce the temperature of the pre-heated smoker.
Make sure to take care when you put the water cup inside the smoker – it will be very hot by now and you don’t want to get burned.
Pro-tip: You don’t just have to use water and, in fact, you can really boost the flavors of the meat by using apple juice, orange juice, pineapple juice, wine, beer, etc. in the water cup. Feel free to experiment. Filipinos swear by the joys of using Sprite when BBQ-ing meat, maybe give that a try?
How To Prepare Meat In Your Electric Smoker
OK, it’s time to get to the brass tacks of smoking – preparing the meat and getting into the smoker and keeping it smoking well throughout the process.
Dry Rub Or Marinade?
You’re not legally obliged to season the meat that you use. In fact, we know of one or two people who swear it’s unnecessary and that the smoke is enough to bring out the taste.
We’re not sure that we agree with them, though, we respect their decision to go their own way.
The real choice for us comes down to whether we’re going to use a dry rub or a marinade? And most of the time, we agree with the people at Bon Appetit – dry rubs are better than marinades.
We feel that marinades work well when grilling but in a smoker where you’re looking for the smoke to penetrate the meat properly – we find that they get in the way. You can always add sauce afterward if you want the textural properties of a marinade.
But get salt, sugar and some spices and rub it into the meat and it comes together in a super caramelized finish that just rocks you out of this world.
However, you’re free to ignore our recommendation and go with whatever you think will work best for you. That’s the joy of cooking – there’s nothing wrong with doing something that works.
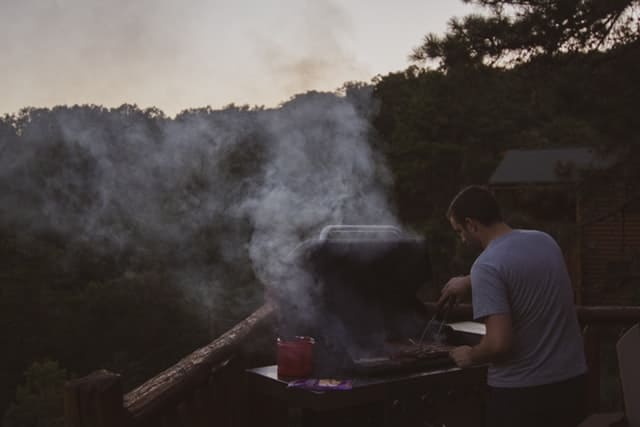
The Meat Goes On The Racks
You should use long-handled tongs to move meat into and out of the smoker. You don’t want to burn your hands or your arms during this process and tongs make for the safest transfer tools that we can think of.
You put the largest cuts at the bottom of the smoker on the first rack above the base. Then you put smaller cuts and any vegetables that you might be smoking on the upper racks
If a cut won’t fit sensibly in the racks – don’t be afraid to cut it up before it goes inside. You don’t have to smoke a rack of ribs as a whole rack, two half racks will do just fine. However, if you’re trying to do this with hot meat – please make sure you’ve got some BBQ gloves to stop yourself from getting burned.
Try to keep the door closed for as long as possible and add meat quickly and efficiently to prevent the smoke from escaping.
Securing The Smoker Door
Once the meat is inside, you want to close the door and then use the lock mechanism to properly secure it – this is particularly important if there are children around who might be tempted to play with the door because the food smells so good.
How Long Should You Smoke For?
Get the smoker manufacturer’s handbook out and check their recommending cooking times, if there aren’t any – then use the times recommended in the recipe that you’re using.
Smoking can take a long time, sometimes, and up to 8 hours is possible though many things can be smoked in 90 minutes or 2 hours.
Try not to open the smoker unless you have to (usually to top up the water bowl).
Check The Chips And Water Levels
The wood chips will be consumed as you smoke and you need to top them up as they start running low. If the smoke stops in the smoker, you need to add wood chips. Get 1-4 cups of chips in the tray as soon as possible and then slide it back in and get smoking again.
Some people argue that you should stop smoking food when you use the first tray of chips and that any more is overkill. We think this is a matter of personal taste and that some foods require more smoking than other foods do. It’s your food and thus, your call.
You should also keep an eye on the water and refill it as necessary – you don’t want the meat to dry out.
Check The Temperature Of The Meat
When you think the meat is ready, check it with a meat thermometer to make sure it has reached a sufficient internal temperature. If it hasn’t it needs more time to cook and you might want to turn up the heat a little. It may take another hour or even two in the smoker to finish
Make Sure The Meat Gets Time To Rest
Then remove the meat from the smoker and let it rest for about 20 minutes and then serve it. If you don’t let it rest the cooking process doesn’t complete properly and some parts of the meat will be drier than they should be.
If you have anything leftover at the end of eating. You can put the leftovers in the refrigerator for about 4 days as long as they’re in airtight containers.
How To Clean An Electric Smoker After Use
We have a more detailed guide to cleaning an electric smoker on this site, but we’ll touch on the basics here because you should wash your smoker every time you use it.
Unplug And Cool The Smoker
It sounds obvious but you want to disconnect the electricity and let the smoker cool down completely before you clean it. You don’t want electric shocks or burns.
Take Out The Accessories
You want to remove the chip tray, water cup, racks, etc. before you start the cleaning process too.
Get Rid Of Any Debris
Get a paper towel, moisten it slightly and just wipe out the large pieces of debris inside the smoker. If there’s a lot of debris, you can use a small dustpan and brush to speed this process up.
Scrub The Inside
Get a sponge and some warm soapy water and clean the smoking chamber thoroughly. You can also clean the racks and other accessories this way.
If there’s a glass front to your smoker – use a glass cleaner suitable for use on ceramics to clean it with.
Don’t use abrasive cleaning products inside the smoker.
Wipe Out The Inside
Now give everything a last wipe with a damp, cloth on the inside and then wipe the outside too.
Pat The Smoker Dry
You can leave the smoker to air dry but if you intend to use it after cleaning, then pat it dry with a paper towel before you fire it up.
Awesome Tips To Get More From Your Electric Smoker
OK, so now that we’ve got the basics under your belt, let’s look at some awesome tips that are going to help you extend the use of your electric smoker and get the best possible food from it.
Swap Out The Chip Tray For A Tube or Box
Let’s be fair about this – the chip tray is a bit of a pain. We understand how nicely it fits in the back of an electric smoker but it’s just not big enough. You can end up running back and forth to the smoker constantly to keep it topped up and let’s be blunt here if you wanted to do that – we’d use a charcoal smoker.
If you let the chips run down too low during the smoking process – you get a poor final product without much taste, so doing nothing really isn’t an option.
Fortunately, you don’t have to get stuck with this problem. They sell products that act as an extension to the chip tray on Amazon and they’re pretty cheap.
For example, the A-Maze-N AMTNS12 Oval Pellet Tube Smoker will allow you to create smoke for your electric smoker for about 4 hours without needing to change the pellets in it.
If that’s not enough, you can try the A-Maze-N AMNPS Maze Pellet Smoker which allows for up to 12 hours of smoke without being attended to.
You’ll know within a few hours of using your electric smoker as to whether you want one of these two extensions and we’re pretty certain that most people will.
Please remember, you need to light the pellets in these trays before you put them inside the smoker. You can use a lighter or a blowtorch to get them alight, but make sure to blow out any flames before you pop them inside the smoker.
You can even burn from both ends of a pellet extension tray (though it will, of course, only last half as long) if you want an extra smoky finish.
Don’t Soak The Wood Chips
If you’re using a water tray, then there is really absolutely no need to soak the wood chips before you put them in the smoke tray.
We won’t judge you if you do soak your chips, but that extra white smoke look that you get? It’s just steam coming off the chips before they burn properly.
Given that you’ll get steam from the water tray, you’re just doubling up for no good reason. The best smoke from wood chips out to be thin and slightly blue. That’s going to create the best smoke flavor on your food and that is why you’re smoking food, right?
Also, the white smoke from wet chips can be more difficult to keep at a constant temperature and worse, in the longer-term it’s going to start causing your smoker to rust. You don’t want that, do you?
Remember That Over-Smoking Is Not A Good Thing
One thing that ought to be obvious but isn’t stressed in the recipe books – smoke is a good thing. However, you don’t want as much smoke as you can humanly create either, you need a balance of smoke and air and meat to get the best flavors.
If you use too much smoke, especially when cooking chicken or other forms of poultry, you’re going to end up with food that can be pretty disgusting. Poultry shouldn’t need more than a single tray of chips or pellets to get it smoked to perfection.
Be Aggressive When Smoking Chicken
Lots of people seem to think you cook chicken and poultry slowly and over low heat. We beg to differ. It’s dangerous to end up with undercooked chicken and Gordon Ramsay recommends cooking poultry fast and high.
So, aim for a temperature of 275 degrees Fahrenheit and smoke fast. No more than 2 hours, probably 90 minutes and you’re going to end up with a tasty bird that is in perfect eating condition.
Don’t forget that your bird should have reached an internal temperature of 165 degrees to be safe to eat. You can only determine this with a meat thermometer. Don’t try and guess when it’s ready or assume that a cooking time completed is enough.
You really don’t want food poisoning and chicken is notorious for giving people food poisoning when it’s not fully cooked.
Crisp Poultry In The Oven To Finish
One thing that definitely irks us about smoking poultry is that the skin doesn’t get hot enough to crisp properly. This is a shame because as much as we love that smoky taste we also like the crunch of the skin as we bite into it.
So, we propose a compromise. Grab that poultry from your smoker when it’s roughly 10-15 minutes from the finishing line and place it in a nice hot oven at about 350 degrees Fahrenheit, instead.
Then you get the benefit of the taste of smoke and that lovely crispy skin. This is a big crowd pleaser and if you have guests they’ll think you’ve been using magic in the kitchen.
Watch Out For Temperature Swings
There’s a funny effect with some electrical smokers – the temperature inside can swing from the temperature that you’ve set by as much as 20 degrees Fahrenheit!
This is because of a limitation in the way that the sensors work. Let’s say you want the smoker to be at 220 degrees Fahrenheit. So, you dial in the temperature at 220.
The heating element inside the smoker will switch off at 220 degrees as expected. However, this doesn’t mean that the temperature will stop rising and, in fact, it won’t.
How much higher the temperature gets can depend on several other factors such as how warm it is outside of the smoker and how much of a draft there is.
Then when the temperature starts to fall, when it reaches 220 – the element will switch back on. But, it takes a while to warm up, and while it is warming up the temperature of your smoker is still falling.
So, if you want to hit 220, you probably want to dial into 205 or 210, instead. When the temperature passes 210, change the dial to 220.
This will reduce the swing of the temperature inside (you can’t eliminate it completely) and give your meat a more consistent finish.
Get A Cold Smoking Attachment
If you’re looking to smoke cheese or make jerky, it becomes much easier with a cold smoking attachment for your electric smoker.
Most manufacturers will make one of these for their range of smokers and while they’re not cheap, they’re usually very reasonably priced and can really extend the facility of your smoker.
You don’t need to season a cold smoking attachment.
We’d also strongly recommend you read the manufacturer’s instructions for use for a cold smoking attachment as they can be a little complicated to use effectively.
Keep The Vent Open Fully
Managing the vents on a charcoal smoker is something of an art because it’s how you control the temperature in the smoker. This is not the case with an electric smoker and the easiest way to manage the vents is simply to keep them open fully while you are smoking meat.
This ensures that you don’t get high levels of creosote building up on the meat which is OK in small quantities (as it has a strong smoky flavor) but in large amounts can be absolutely foul. It’s also why we recommend you wash an electric smoker each time that you use – to prevent creosote buildup.
You can close the vent once the meat has been smoked if you’re just looking to boost the internal temperature a little to finish the cooking process.
Aluminum Foil Can Save You On Cleaning
Nobody likes cleaning if they don’t have to do it, do they? Well, we don’t, anyway.
If you cover the racks in aluminum foil before you use them then you can just rip off the foil when you’re done. It’s not very green but it is effective and particularly if you’re smoking at the end of a long day.
In fact, you can always cover the inside of the drip pan and the heat deflector too, if you want the maximum ease of cleaning.
Conclusion
OK, now you know how to use an electric smoker (in 17 steps) and as you can see, it’s pretty simple. You just need to take your time and work through each step before moving on to the next. Using an electric smoker is very easy with a bit of practice and your efforts will be rewarded with spectacularly tasty meat!
Scot has loved smoking food in his free time for the last few years. Each major holiday or off-weekend, Scot spends days testing and prepping new recipes for perfection.