Every home needs a meat thermometer. From roasts to grills to BBQs if you want to serve awesome tasting food that won’t risk the health of you, your family or your guests – you have to be confident that your meat is cooked properly and that’s where a meat thermometer comes in. It’s very easy to learn to use one properly too.
How to calibrate and use a meat thermometer: you can use either iced water or boiling water to calibrate a meat thermometer and the process is quite easy. Using a meat thermometer requires measuring the temperature at the thickest part of the cooked meat and comparing it to our chart to ensure that it’s safe to consume.
Don’t worry – calibrating a thermometer is an easy job and so is using it. We’re going to walk you through every step of the process so that by the end of this article, you’ll be an expert.
What Is A Meat Thermometer?
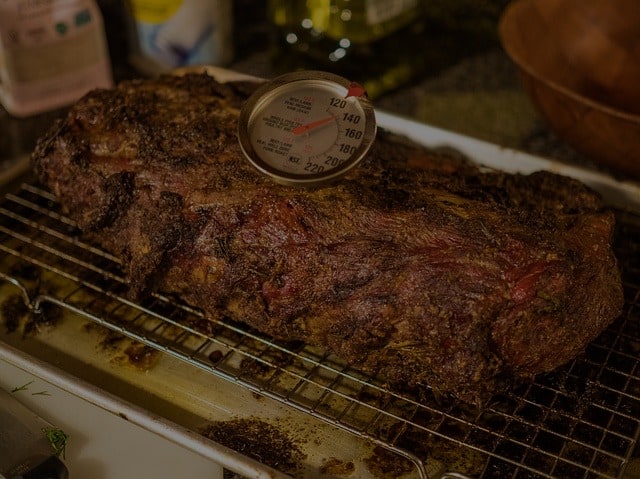
A meat thermometer is simply anything that can measure the temperature of meat during cooking. In order to do this, you’ll find it has a metal probe that ends in a sharp point which can be gently pushed into cooking meat.
It will also have a dial or a digital display so that you can get a temperature readout.
They come in three main types:
- A bi-metallic strip sensor. This will have a rotating needle on a dial at the top.
- A pop-up timer thermometer. These “pop up” when the right temperature is reached and are very common when people cook turkeys.
- An electronic sensor. These will often have a wire which connects the sensor to the thermometer though more modern ones can be wireless.
You can leave a bi-metallic sensor or a pop-up timer in the meat while it cooks. Whereas most electronic sensors are meant to be used to check the temperature and are then removed while cooking takes place.
Why You Need To Calibrate A Meat Thermometer
A thermometer is only useful if it gives you an accurate readout which reflects the actual temperature inside the meat. If the answer it gives is wrong – the thermometer may lead to you eating undercooked food and that might lead to food poisoning. Calibration ensures that you get the right temperature reading from your thermometer.
Cooked Meat & Food Poisoning The Hard Facts
It is estimated that 1 in 6 Americans gets a food born illness each year and, surprisingly it’s actually leafy green vegetables that make people ill most often. However, the most serious forms of food poisoning are often related to undercooked meat.
More than 9,000 people die each year from food poisoning. It’s no joke and that’s why you’re always going to want to calibrate and use a meat thermometer properly.
How To Test Your Meat Thermometer
Before you calibrate a meat thermometer – it can be useful to test it, to see if it actually needs calibrating.
For this most people are going to use a glass of iced water. Here’s how it’s done:
- Take a glass and fill it with ice cubes
- Add water until the glass is almost full
- Stir the water
- Let the water sit for 4 minutes
- Stir the water once more
- Place the thermometer in the water but make sure it doesn’t touch the sides of the glass (which will distort the reading)
- The readout should be 32 degrees Fahrenheit if not make a note of it
That’s it. You now have a tested meat thermometer.
How To Calibrate A Meat Thermometer: The Easy Way
Calibrating a meat thermometer if you’ve just tested it in iced water is easy. Before the thermometer has a chance to return to normal, adjust the scale so that the temperature of your iced water is 32 degrees Fahrenheit.
If your thermometer is marked in Centigrade rather than Fahrenheit – the setting should be for 0 degrees Centigrade.
How To Calibrate A Meat Thermometer: The Slightly Harder Way
If you have no access to ice, then you can use a more difficult method to calibrate your meat thermometer. It’s not very hard but you do need to pay a bit more attention to the details with this method if you want to get the best results:
- Get a water boiling point calculator or use this one online and work out the boiling point of water at your elevation (of course, this is 212 degrees Fahrenheit or 100 degrees Centigrade at sea level)
- Then boil a pot of water on the stove
- When it’s reached the boil, you can put the thermometer bulb in the water and again, please make sure not to touch the sides of the pot because it will interfere with the readout of the thermometer
- Make a note of the temperature
- Compare the temperature readout to the water boiling calculator’s expected result
- Adjust the thermometer to give the number provided by the water boiling calculator
What To Do If Your Thermometer Doesn’t Allow For Adjustments?
Most modern meat thermometers allow for easy adjustments of the readout using a dial or button control. However, there are some out there that don’t have a system for adjusting the thermometer’s readout.
If you have one of these – mark the temperature difference using a piece of blue tape on the scale, instead. It’s not perfect and we’d recommend getting a better meat thermometer for future use, but it will do in a pinch.
If you have a digital thermometer which cannot be calibrated, you can scale the difference between the expected results to check the final temperature. This is not so hard if you’re good at mental arithmetic but if not, you might just want to go and buy a new meat thermometer.
Our Recommended Meat Thermometers
Soraken Wireless Meat Thermometer

This is easily one of my favorite cooking devices all around. Of course, there are many similar, so picking out another with the features you want will work just fine, but this is the one I like to use.
Wireless thermometers make it possible to allow your food to sit in the oven, on the grill, and in a smoker and you can monitor it via BlueTooth from inside your home or another nearby location. I’ll often start meal and go mow the lawn while being able to check in. I have to mention – the alert feature is amazing. Instead of a timer on the oven, you can just set an alert to tell you when the meat is at your desired temperature.
How To Use Your Calibrated Meat Thermometer
A meat thermometer’s purpose is to measure the temperature of meat, of course, but it can also be used in a variety of other ways.
When checking the temperature of fully cooked meat – it’s important to place the tip in the center of the thickest part of your meat and it should not be touching the bone (this is because bone makes for a much better conductor of heat and you’ll get a false reading which is higher than the actual temperature of the meat).
So, let’s take a look at a variety of substances and how hot they should be and how to measure them:
- Beef, lamb, veal, etc. most meat should be cooked to about 145 degrees Fahrenheit if you’re looking for a medium-rare finish and to about 170 degrees Fahrenheit for a well-done cut. If your meat hasn’t reached an internal temperature of 145 degrees after 3 minutes of resting – it may be undercooked.
- Casseroles. If you’re cooking a casserole or if you’ve been reheating leftovers, then you want a much higher temperature of 165 degrees Fahrenheit at a minimum. However, just because a casserole is hot enough, it doesn’t mean that the meat is tender enough to be eaten.
- Eggs. In most cases, if the eggs are cooking by themselves you should be cooking eggs until the whites and yolks are fully firm. However, if you’re cooking quiches or frittatas or other egg dishes when this distinction is not immediately obvious the internal temperature should reach 160 degrees Fahrenheit.
- Ground meat. There’s not much in it but for ground beef, pork, lamb, or veal you want an internal temperature of 160 degrees Fahrenheit. For turkey or chicken then you want to go a little hotter at 165 degrees Fahrenheit.
- Pork and ham. Pork is actually the same as beef, lamb, and veal as is a fresh ham. If you let it rest for 3 minutes the temperature should be 145 degrees. However, if you’re using a pre-cooked ham and are bringing it up to a temperature that should be a minimum of 165 degrees.
- Poultry. This includes all birds from turkeys to pheasants and, of course, chicken and duck. Testing a bird is best done in the thigh if you have a whole bird, otherwise, you choose the thickest piece available. You want this to be at 165 degrees Fahrenheit.
- Seafood. Things like shells and crustaceans have separate cooking rules which don’t involve temperature readings. However, for fish with fins – you want it at 145 degrees Fahrenheit before serving.
Conclusion
Now, you know how to calibrate and use a meat thermometer. It’s a very easy job, particularly, if you’re using iced water, to calibrate a meat thermometer. Using one is even easier – though it’s important to remember that you should always take the temperature at the thickest part of the meat and never while touching bone.
It’s important to calibrate your meat thermometer at least once or twice a year as you want to make sure that your meat is well cooked because you don’t want to give you or your family food poisoning. Food should be a pleasure, never a health risk.
More like this: Best Wireless Meat Thermometer for Smoker [ANSWERED]
Scot has loved smoking food in his free time for the last few years. Each major holiday or off-weekend, Scot spends days testing and prepping new recipes for perfection.