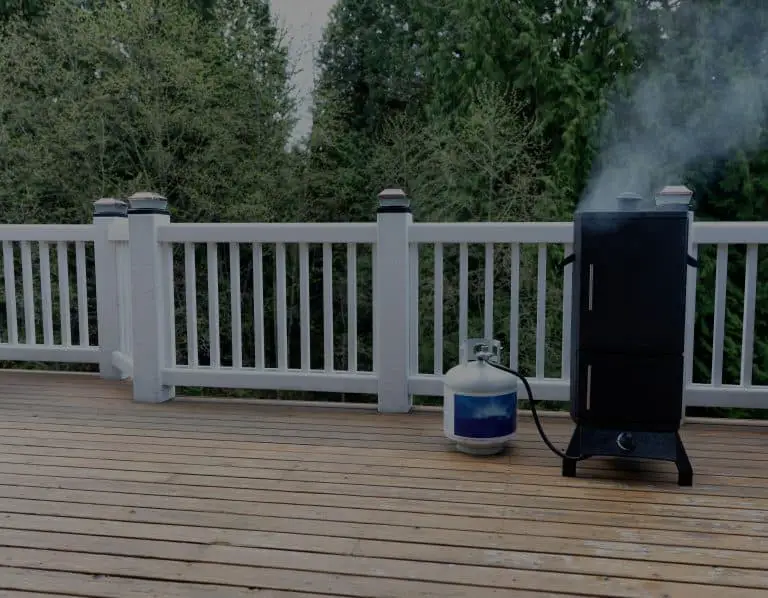
If you’ve got a gas smoker and you’re struggling to get it to smoke, you’re not alone. In fact, it’s not hard to get a gas smoker producing some lovely smoke but it does take a little learning. Fortunately, we’ve got you covered with everything you need to know to get the kind of smoke you’ve been dreaming of from your gas smoker.
So, is your gas smoker not smoking? Here’s what to do – understand how hardwood works to smoke, learn to manage the oxygen flow and use the lid and vents of your smoker, find out when to soak wood chips, learn how to add them to the smoker, know why chunks are better than chips and finally, learn the right types of wood to use in your gas smoker and know which ones won’t produce the right results.
How Hardwood Works To Smoke
If you want smoke to come from your gas smoker, then it’s important to realize that there are 3 components that you need to master in order to get the smoke you want:
- The hardwood – you can’t have smoke without wood.
- The water content of the wood – smoke is, in fact, mainly the water vapor being driven out of the hardwood.
- Oxygen – your hardwood cannot smoke at all if it’s not burning and if you want a fire, you need fuel for it and that’s oxygen.
In general terms, hardwood contains its own water content. There is “free water” the water which is free to move between the cells of the wood and “bound water” which is the water that sits in the cell walls of the wood.
When wood is freshly cut it has too much water content to be useful to your smoker. You’ll end up with a cloud of thick acrid smoke that tastes terrible and ruins pretty much everything it comes into contact with.
If the wood has been hanging around forever, however, it’s going to be too dry. It will burn very quickly and there won’t be enough water to produce the smoke you seek. From a cooking perspective, it will also burn too hot and quickly dry out whatever you’re trying to prepare.
When To Soak Your Wood Chips
If you’re using wood chips, you’re going to find that you’re going to need to soak them in order to get them to the moisture content you need for a good head of smoke.
If you don’t soak them – they’re going to burn at a ridiculous rate and that’s going to end up being very expensive and your smoked products will be overcooked and won’t taste very good. In fact, there’s a distinct possibility that they will just catch fire.
So, about 30 minutes before you begin cooking with wood chips put them into water and let them soak. How much water? That depends on what, exactly, you’re trying to cook – the recipe you have should indicate the water content required. If not, you can Google for this before you cook.
How To Add Chips To The Smoker To Make Them Burn Best
We recommend that you pre-heat your grill for about 15 minutes before you start smoking and that you do so on a high heat setting.
Before we talk about how chips are added to the smoker to burn the best – we think it’s important to stress that you add chips to a smoker with long-handled tongs. This means that you’re going to avoid getting any burns to your hands.
You simply pick up some soaked wood chips and let as much water drain from them as possible before you add them to the smoker box of your grill.
You’re looking to evenly spread the damp wood chips in a layer over the base of the smoker box. This gives them the greatest surface area and thus, in theory, they should burn at the most even rate and produce the best levels of steam.
Your recipe ought to indicate how many wood chips that you will need for this – make sure to add enough to keep things going for the whole cooking process.
Then close up the grill and wait 5-10 minutes until you can see smoking rolling off the grill. At this point, you should drop the temperature of the burner under the smoker box to medium or low heat. This will reduce the rate of burning and ensure plenty of smoke without wasting all the wood chips.
Chunks Beat Chips For Gas Smoking
We know that a lot of people who use gas smokers will stick to wood chips because they’re very easy to work with but there is a strong argument to abandon them in favor of using wood chunks, instead.
Chips, the professionals say, are the ideal tool for cooking a single item for a short period of time. However, if you want to cook a feast with many different items, you’re going to go through a ton of chips and have to constantly top off your smoker box.
Why bother with all this effort (and expense) when you can just use bigger pieces of wood? This is going to mean they burn longer and produce larger quantities of smoke and that’s going to mean less work overall.
It’s also easier to switch out the different types of wood when you use chunks, so you can mix and match types of smoke as needed for the best tasting food.
The Right Types Of Wood For Your Gas Smoker (And The Wrong Ones)
When it comes to selecting wood for your gas smoker – you should be aware that only chips (that is pieces of wood between ¼” and 1” thick) and chunks (that is pieces of wood up to 4” thick) are going to be suitable for most gas smokers.
Sawdust, pellets, and disks are all too small and are likely to burn too quickly to produce smoke of any kind on a gas smoker. It’s also worth noting that sawdust and gas is a potentially deadly combination and could result in a dangerous explosion. Don’t be tempted to cut corners here.
Logs, that are pieces of wood that are up to 18” long, are way too big for most gas smokers. They’re mainly used in large offset smokers and in commercial operations. That doesn’t mean that you couldn’t cut these up into chunks or chips but it does mean that they can’t be used as-is.
Managing Oxygen Flow For Smoking
All of our tips so far, however, aren’t going to work for you if there’s not enough airflow coming over your hardwood. Chips, chunks, or whatever simply won’t burn without fuel. To get this right you need to check the vents and learn to work with the lid of your grill.
Check The Vents
When you first start working with your smoker, you’ll notice that it will have some sort of venting. The better models will offer some degree of user control over the vents. This means that you’re going to need to pay attention to the way they open when you’re burning wood.
You’re looking to get the right balance between drawing oxygen in for fuel and venting (which sends that smoke back out again).
Working With The Lid Of Your Smoker
The lid also plays an important part in burning your wood. On a gas grill, the lid is hinged, and it should be completely attached to your grill.
The lid will also have some vents on it. This is to ensure that the gas you are working with is vented properly from the grill and does not build up to dangerous levels.
Once you start burning, you shouldn’t keep opening the lid of your grill. This will change the heat environment within the grill and make it much harder to cook the food, you will also end up losing much of that lovely smoke you’re building up inside the grill.
So, the rule here is very simple. Once you start to cook, the lid should be left alone until you think the cooking is over.
Conclusion
We hope that our guide to “is your gas smoker not smoking? Here’s what to do” has helped you to better understand your gas smoker.
Really, it’s all a question of getting the right wood (chips or chunks), the right level of water (soak chips if necessary) and the right oxygen flow (adjust vents as needed) to ensure that you get the perfect head of smoke to cook your food with.
It takes a little practice to master this with each smoker but once you’ve got it under control, it will be easy to do it time and again in the future.
Continue Reading:
Scot has loved smoking food in his free time for the last few years. Each major holiday or off-weekend, Scot spends days testing and prepping new recipes for perfection.