For many of us who love smoked food, buying top-end smokers can be too expensive. That is when a DIY smoker can bring the same taste and tenderness but without having to spend a lot of money.
Traditional homemade smokers like clay pot smokers are not only inexpensive but also require minimal expertise to design and construct. With the knowledge of some basic skills, such as welding and woodworking, advanced pitmasters can also make sturdy smokers made of concrete blocks, old propane tanks, or a DIY smokehouse made from wood pallets.
Low smoke cooking is the essence of barbequing and to get that perfectly tasting juicy and tender meat using an efficient smoker is the key. Here are some unique and simple DIY smoker designs that will give you the joy of barbequing with minimum investment:

How To Build A Smoker
Building your very own DIY Smoker is an exciting experience for every pitmaster. A smoker is a piece of outdoor equipment that infuses an exemplary smoky flavor to meat, fish, and other foods. Homemade smokers, by design, are usually layered into the following stages – an ignition source, water pan, a fuel source, trays where you can place the food/ metal grates, and a cover. Additionally, you should also invest in a cooking thermometer and attach it to the smoker. This thermometer will help in measuring both the internal and external temperature, which is crucial for retaining the tenderness and the flavors of the meat.
Homemade Smoker Plans From Beginner To Advanced
Based on your requirements, skills, and budget, here is a list of homemade smoker plans from beginner to advanced levels:
-
Clay Pot Smoker
This is the most traditional and inexpensive way of smoking food. Clay is a natural insulator, which slow-cooks and infuses an impeccable earthy taste to the meat. The materials required to build a terracotta or a clay pot smoker are – a clay pot with a large bottom (at least 12 to 16” in diameter), clay pot lid, electric hot plate, 5 to 7 pieces of 2-inch thick bricks, metal pie pan, oven thermometer, and a metal grate.
Design & Working Of A Clay Pot Smoker
- Place 4 or 5 bricks to make a stage for the hot plate (of 1000W or greater). The space between the hot plate and the bricks will help in air circulation.
- Next, place the pie pan over the hot plate and the clay pot on top of it. Set the metal grate about 1/4th inside of the clay pot on which the marinated food will be placed. Once the assembly is completed, cover with the clay pot lid.
- You can also add a handle by drilling a hole in the clay cover and fitting bolts, washers, and nuts.
Once the structure is built, place the smoker outdoors in a sheltered area. Some trial and error would be required to get the smoker started at the desired temperature of about 210 to 225 degrees Fahrenheit. It may take up to 4 ½ to 5 hours to cook the meat at the recommended internal temperature of 180 degrees Fahrenheit.
Watch this video and learn to construct a DIY smoker for less than $20.
-
DIY Smokehouse
A DIY smokehouse can be made using wood pallets. With the right design and the knowledge of basic woodworking, you can get a space of about 3 X 3 inches, which can cook large volumes of food on the go. The materials required to build a DIY smokehouse are – a pile of wood pallets (about 20-30) or repurposed wood of 42 to 48 inches each, aluminum flashing, drill guns and beats, a corrugated tin roof, screws, heavy-duty tin foil, handle, hinges, utility knife, and screws.
Design & Working Of A DIY Smokehouse
- Deconstruct the wood pallets and make measured cuts for the door frame, front and back top braces, back frame, wall frame, shelf supports, shelf frame, roof, vent covers, and pieces for side frames.
- Layout the frame and assemble and secure the smokehouse with screws in a step-by-step process. Don’t forget to line the interiors with heavy-duty tin foil. (Here’s a Complete Tutorial on How to Construct a DIY Smokehouse using wood pallets).
-
Barrel Smoker
Remodeling an old barrel can give you results equal to offset smokers. The materials required for a barrel smoker are: an old barrel (preferably a food-grade barrel), brackets, bolts, racks, stands to hold the barrel, drill, and screws.
Design & Working Of A DIY Barrel Smoker
- Clean and scrub the barrel thoroughly and repair any holes, cracks, or rusted areas. Cut out a portion of the barrel so that it can work as the lid of the smoker.
- Use the stands to design legs and a support system that will hold the barrel. Fix the entire unit with carriage bolts to keep the smoker sturdy.
- Use brackets and racks to hold the fuel (wood or coal) and allow air circulation.
- You can also install air vents, a temperature gauge, or probably a handle for more efficient smoking.
The working of a DIY barrel smoker is pretty simple. Lit the fuel source beneath the racks and place the meat on top of it. Close the lid and let the food cook at the desired temperature.
-
Smoker With Concrete Blocks
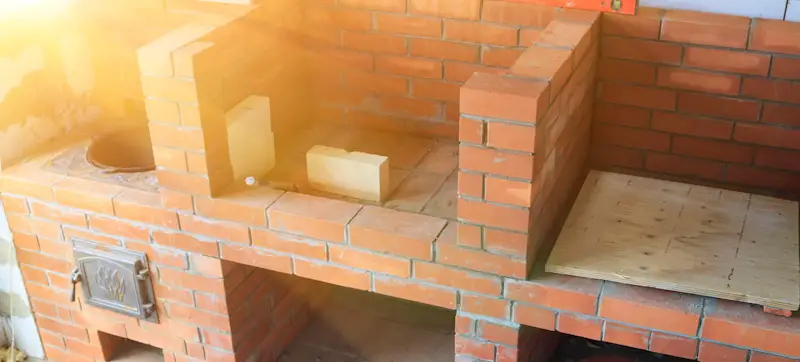
If you use a smoker frequently and have decent space in your backyard, you can choose to design a smoker using concrete blocks. The materials required to design a DIY smoker with concrete blocks are – concrete blocks, bricks, plywood, and a tile.

Design & Working Of A Smoker With Concrete Blocks
- Layout the frame of the smoker using concrete blocks and bricks. (Watch this video to have an idea about the construction of the DIY smoker).
- The order of the layers in a concrete smoker are a layer of vertically placed concrete blocks, the tile which works as the base, the fuel source (charcoal or wood pieces), and the grate where the food is placed for smoking.
Once organized, just place the charcoal at the bottom of the smoker and ignite the fuel from the sides of the smoker. Place the metal grate and the marinated food after leaving some space and cover with the plywood. Smokers with concrete blocks may require 2-5 hours for cooking.
Keep reading: How Long Does Beef Jerky Last? What You Need to Know!
-
Propane Tank Smoker
If you have an empty propane tank, you can breathe a new life into it by transforming it into a barbeque smoker. You should have the skill of using an angle grinder and a welding torch to construct this smoker. The materials required to construct a propane tank smoker are – an empty propane tank, steel pipe, steel sheets, small steel boxes or gas tank, circular metal grate, angle grinder, drill and drill bit, metalworking lathe, and welding torch.
Design & Working Of A Propane Tank Smoker
- Building a propane tank smoker requires you to have the knowledge of using an angle grinder, welding torch, and a metalworking lathe. Here’s a complete video tutorial on how to Build A Propane Tank Smoker.
The working of a propane tank smoker is similar to other types of DIY smokers and may take up to 3-5 hours for complete cooking of the meat.
Also read: How to Make Smoker Mac and Cheese [BEST MAC & CHEESE EVER]
Final Words
All these homemade smoker plans are recommended for outdoor use only. You can also make DIY smokers using old and waste items such as old flower pots, whiskey barrels, or even a filing cabinet. Depending upon your skills and expertise, you can choose to make any of the abovementioned DIY smokers. Before smoking, make sure you season the grill and use the right kind of wood and marination to yield the juicy tenderness and the unique flavor of smoked food.
Keep reading:
- How to Make Beef Jerky in a Smoker – Guide
- Old Country Gravity Fed Smoker
- How to Smoke a Brisket in an Electric Smoker?
Scot has loved smoking food in his free time for the last few years. Each major holiday or off-weekend, Scot spends days testing and prepping new recipes for perfection.

